WordPress plugin helps users to extend the functionality. You can install a plugin in WordPress site as per your requirements. For e.g. you can build a contact form using a plugin. You can setup an image gallery using a WordPress gallery plugin.
So, here is a quick guide for beginners that will show you how to install plugin in WordPress.
You can install plugin in three ways:
- Install a plugin using WordPress Admin Panel search option.
- Manually upload a plugin through WordPress.
- Manually upload a plugin using FTP manager.
Since this guide is for beginners FTP method is not suitable for them. This method is a bit complex because you need to access your host through FTP manager when you install plugin from this method. So, we are discussing only two methods in this article and share another detailed article for FTP method.
Install a plugin using WordPress Admin Panel Search option
This is the easiest method of installing any plugin. To use this method it is necessary that your plugin must exist in WordPress plugin directory. You can install only free plugins with this method.
Click on Plugin >> Add New option present in WordPress Admin Panel.
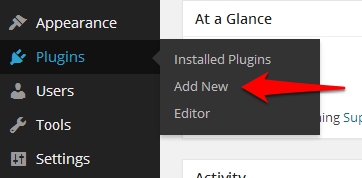
When you click on add new you will see the screen like below screenshot:
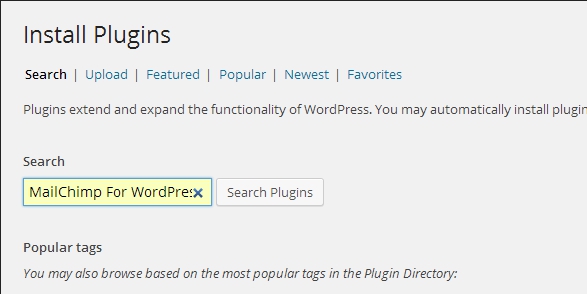
Type the name of plugin in search box you wish to install on your WordPress site. Click on Search Plugins button. In this article we search for random plugin as an example for you. When you search for the plugin you will see the list of plugins like below:
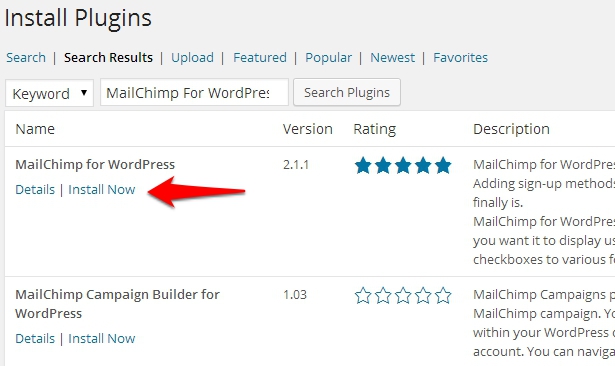
Click on Install Now option. When you click on this option the pop-up window will appear on screen ask you to confirm the installation of plugin. You will see the result like below screenshot:

Once you click on OK your plugin is downloaded and installed on your WordPress site and you will screen like below:
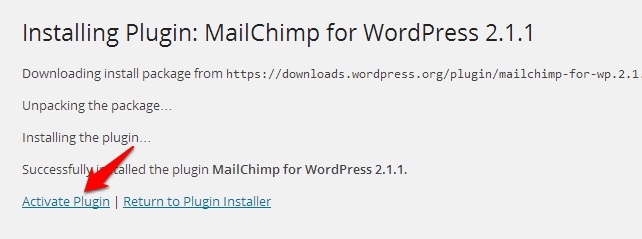
Click on Activate plugin to activate the plugin. You can also change and configure the settings of plugin that you’ve installed on your site.
Install a plugin using Upload method
You can use this method when you want to download any premium plugin or if you are installing any plugin from WordPress.org.
To install any plugin by this method, first you need to download the plugin from the souce and the downloaded plugin file is in zip format. Now go to your WordPress Admin panel and click on Plugins >> Add New. Once you click on this option you will see the screen like below screenshot:
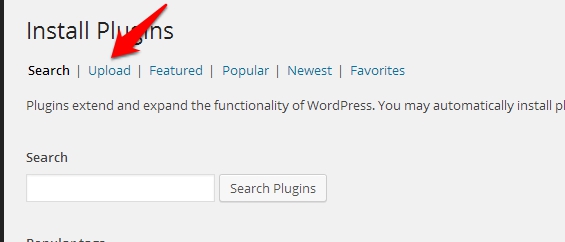
Once you click on Upload option it will ask you to choose the zip file of plugin you downloaded on your system like this:
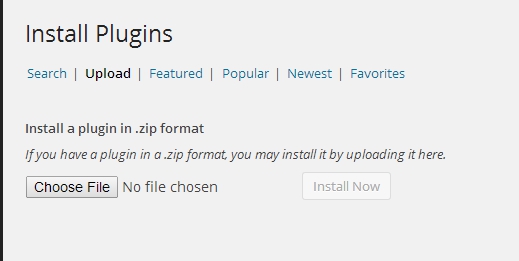
Browse the downloaded zip file and upload it on your WordPress site. When you select your file it will ask you to install it. Once you click on the Install Now option and your plugin is installed on your WordPress blog.
After installing the plugin, simply activate it and configure the settings according to your requirement.
I hope this guide helps you in installing the plugin on your WordPress site. If you’ve any queries related to this guide, please feel free to ask here.