Tatva is a beautiful WordPress theme especially designed for all kind of business and corporate websites. The theme has been designed to be completely responsive which means it is compatible on all kind of devices.
The theme comes with number of great features like:
- Mobile responsive design
- Multiple color schemes.
- Integration with WooCommerce and EDD
- Dynamic widgets area.
You can see full feature list of Tatva theme here.
Importing sample content
After installing the theme, you can import sample content on your website.
- Install and activate the Widget Importer/Exporter plugin.
- Click here to download sample content file .
- Go to Tools >> Widget Importer & Exporter. Now import and upload the file.
Now Sample content is successfully uploaded on your website.
Installing Testimonial Plugin
After you activate the Tatva theme, you’ll see a message at the top for installing Testimonial plugin. Follow the steps to install and activate the plugin.
Alternatively,
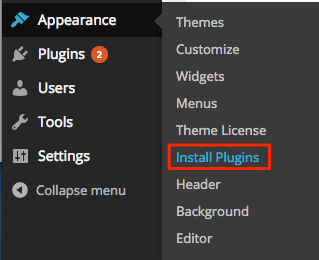
- Go to Appearance >> Install Plugin. (Since the theme is already integrated with this plugin)
- Install Testimonial plugin.
- There is an option on the same page to activate the plugin like below screenshot:
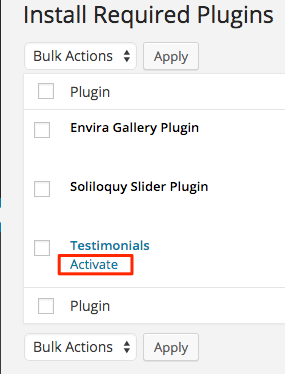
This plugin is used to create testimonials on your website. The theme offers two more plugins: Envira gallery and Soliloquy slider. If you want to activate these plugin, activate it in similar manner as above.
Setting a Static Front Page
Tatva uses Static Front page option for displaying the content and widgets of home page of your site.
- Go to Pages >> Add New. Create “Home” Page and publish it.
- Create another page “Blog” and publish it.
- Go to Settings >> Reading panel.
- Set Front page displays to a static page.
- Select Home front page and Blog as posts page and save the changes.

Customizing Tatva
Tatva theme has different options that will help you to setup a website similar to demo site. Go to Appearance >> Customize.
Setting up Site tile, tagline and Header Image
Enter the title and tagline of site that suits your business identity or add logo of your business in Header image section.
Setting up color scheme and layout
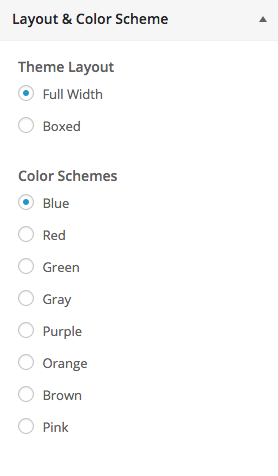
Select the color that suits your business identity out of 8 color options. If you want to add background image on your site set Boxed layout.
Setting up Front Page featured posts
- Enter the Title and number of posts to display on the home page of your website.
- Select the category to display posts category wise (optional).
- Enter posts Read more link text.
Setting up Home Page Widgets
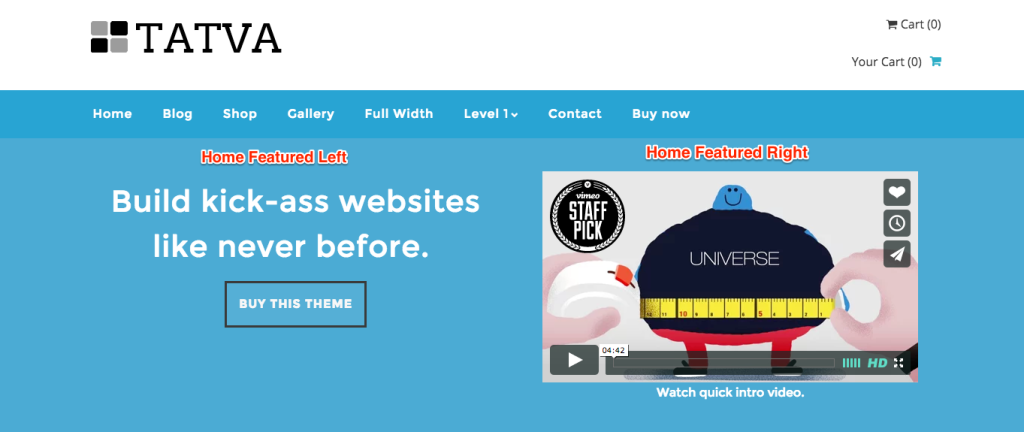
1. Home Featured Left and Right Widgets
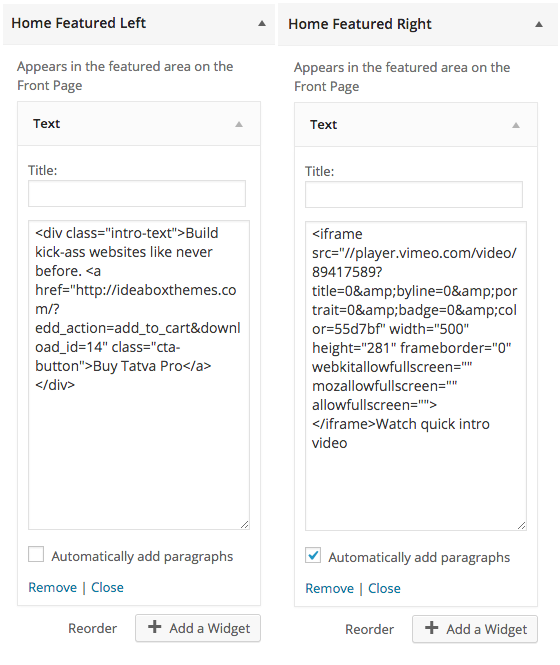
Enter the text, image, video or anything else you want to add in Home featured left and right widget just like above screenshot.
You’ll see the result like below screenshot:
Note: If you leave any of the above two section blank the other section will display in full width.
2. Home Widgets
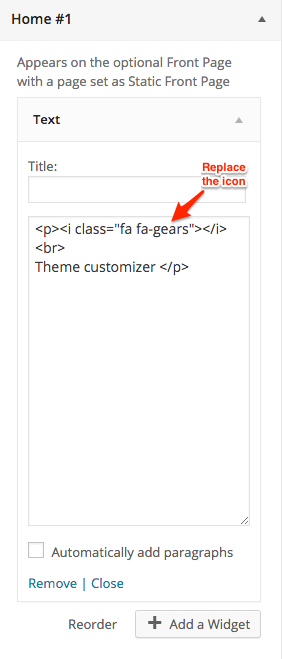
Add your services using font awesome icons in Four column Home Widget section. Click here to see the all font awesome icons.
- Add Text widget by clicking on Add Widget button.
- Enter the code like above screenshot.
- Replace the icon in code with fa- name of icon.
You’ll see result like below screenshot:

3. Home Testimonials
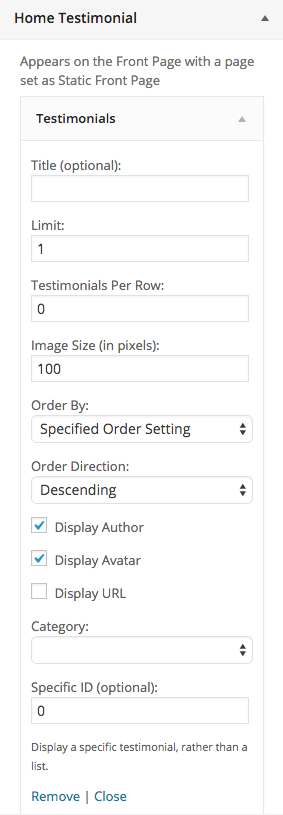
For this you need to install Testimonial plugin that we’ve already discussed earlier.
- Go to Testimonials >> Add New into your WordPress Admin area.
- Go to Appearance >> Customize >> Widget.
- Add Testimonials widget under Home testimonial section.
- Add Title (optional), limit, Image size, Order by, enable/disable display author and avatar options.
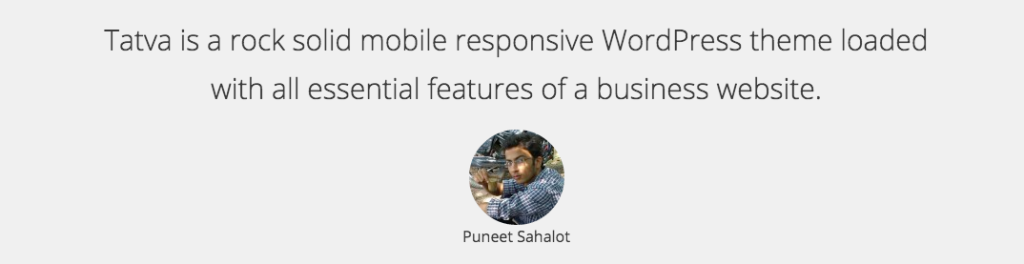
You’ll see the result like below screenshot:
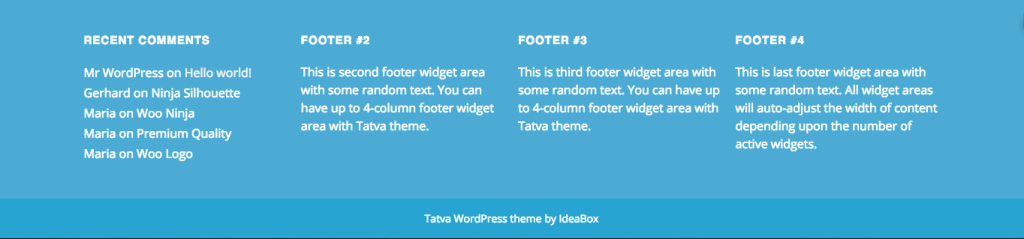
4. Footer Widget
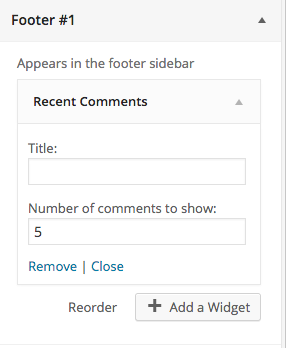
The four column Footer Widget content as in Demo site comes from the following steps:
- Add the widgets that you want to display in Footer #1.
- Add second widget to display in Footer #2.
- Similarly add widgets in Footer #3 and #4.
Tatva is integrated with WooCommerce and Easy Digital Downloads plugin. So you can easily build e-commerce website.
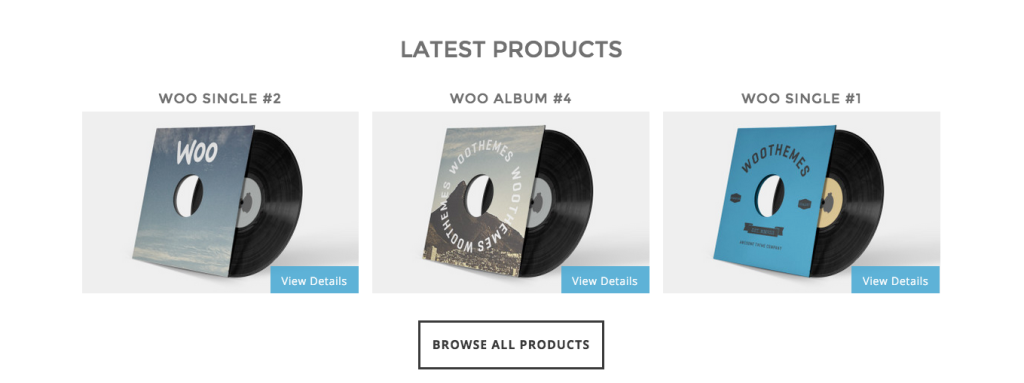
Setting up Front page Woo Products
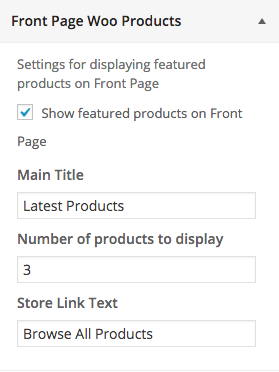
- Install and Activate the WooCommerce plugin.
- Go to Front Page Woo Products in Customizer.
- Enter Title, Number of products to display and Store link text.
Setting up EDD Front Page
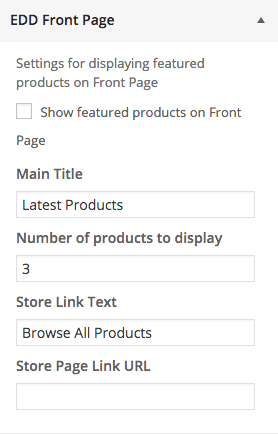
- Install and activate the Easy Digital Downloads plugin.
- Go to Shop page into Pages option and select template as Store.
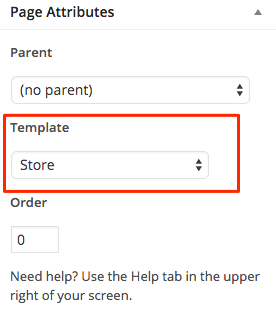
- Now, go to EDD front page in Customizer.
- Enable/Disable Show featured products on Front option and enter the Title, number of products to display and store link text and URL.
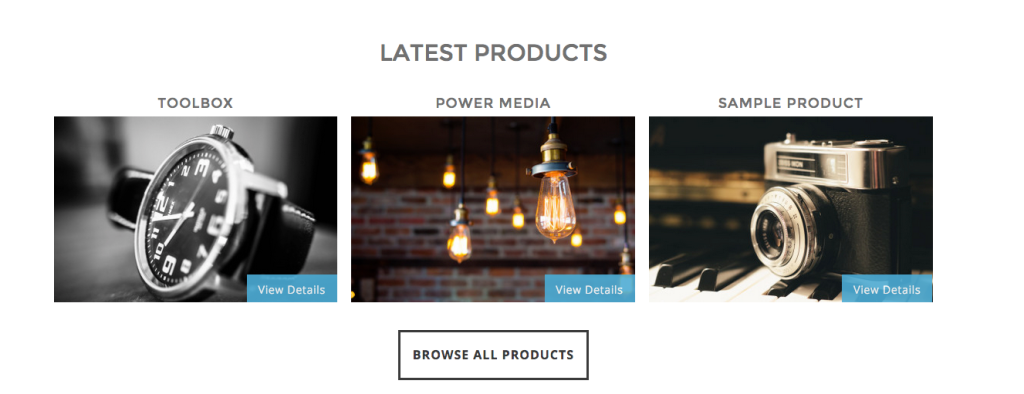
Note: You can choose any of the above two plugin to show featured products on front page.
Once you’re done, Click on Save and Publish button.
If you’ve got any question or facing any trouble setting up the theme, please contact us via our support page or comment section below.
Muawia says:
Great article and great Theme am planning to buy one .
Thanks Kriti